Google Workspace
Overview
This topic explains how to configure Google Workspace to support single sign-on (SSO) in LaunchDarkly.
Google OAuth is different from Google Workspace SSO
The procedures in this topic explain how to configure SSO for Google Workspace. To learn how to configure Google OAuth instead, read Google OAuth.
If a member signs in to LaunchDarkly using Google OAuth, they cannot also sign in to the same account using Google Workspace SSO. Similarly, if you invite a member to join a LaunchDarkly account using Google Workspace SSO, they cannot also sign in using Google OAuth.
Prerequisites
To configure SSO for LaunchDarkly using Google Workspace, you must complete the following prerequisite:
- Configure SAML for authentication. For more information, read the Google knowledge base.
Use the table below to configure Google fields for LaunchDarkly:
Configure SSO for LaunchDarkly with Google Workspace
Before you create the LaunchDarkly app in Google Workspace, you must create LaunchDarkly-specific fields for roles, custom roles, and teams.
To configure these fields:
- Log into Google Workspace.
- Navigate to your user directory by clicking Directory and then Users.
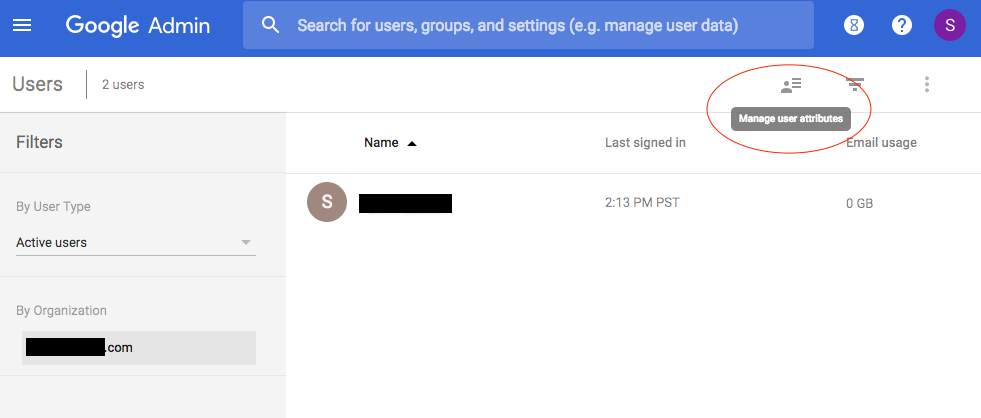
- Click the Manage user attributes icon. A popup screen appears:
- Select Add Custom Category.
- Name the custom category whatever you like. The example below uses LaunchDarkly Attributes.
- Add the
role,customRole, andteamKeyfields:
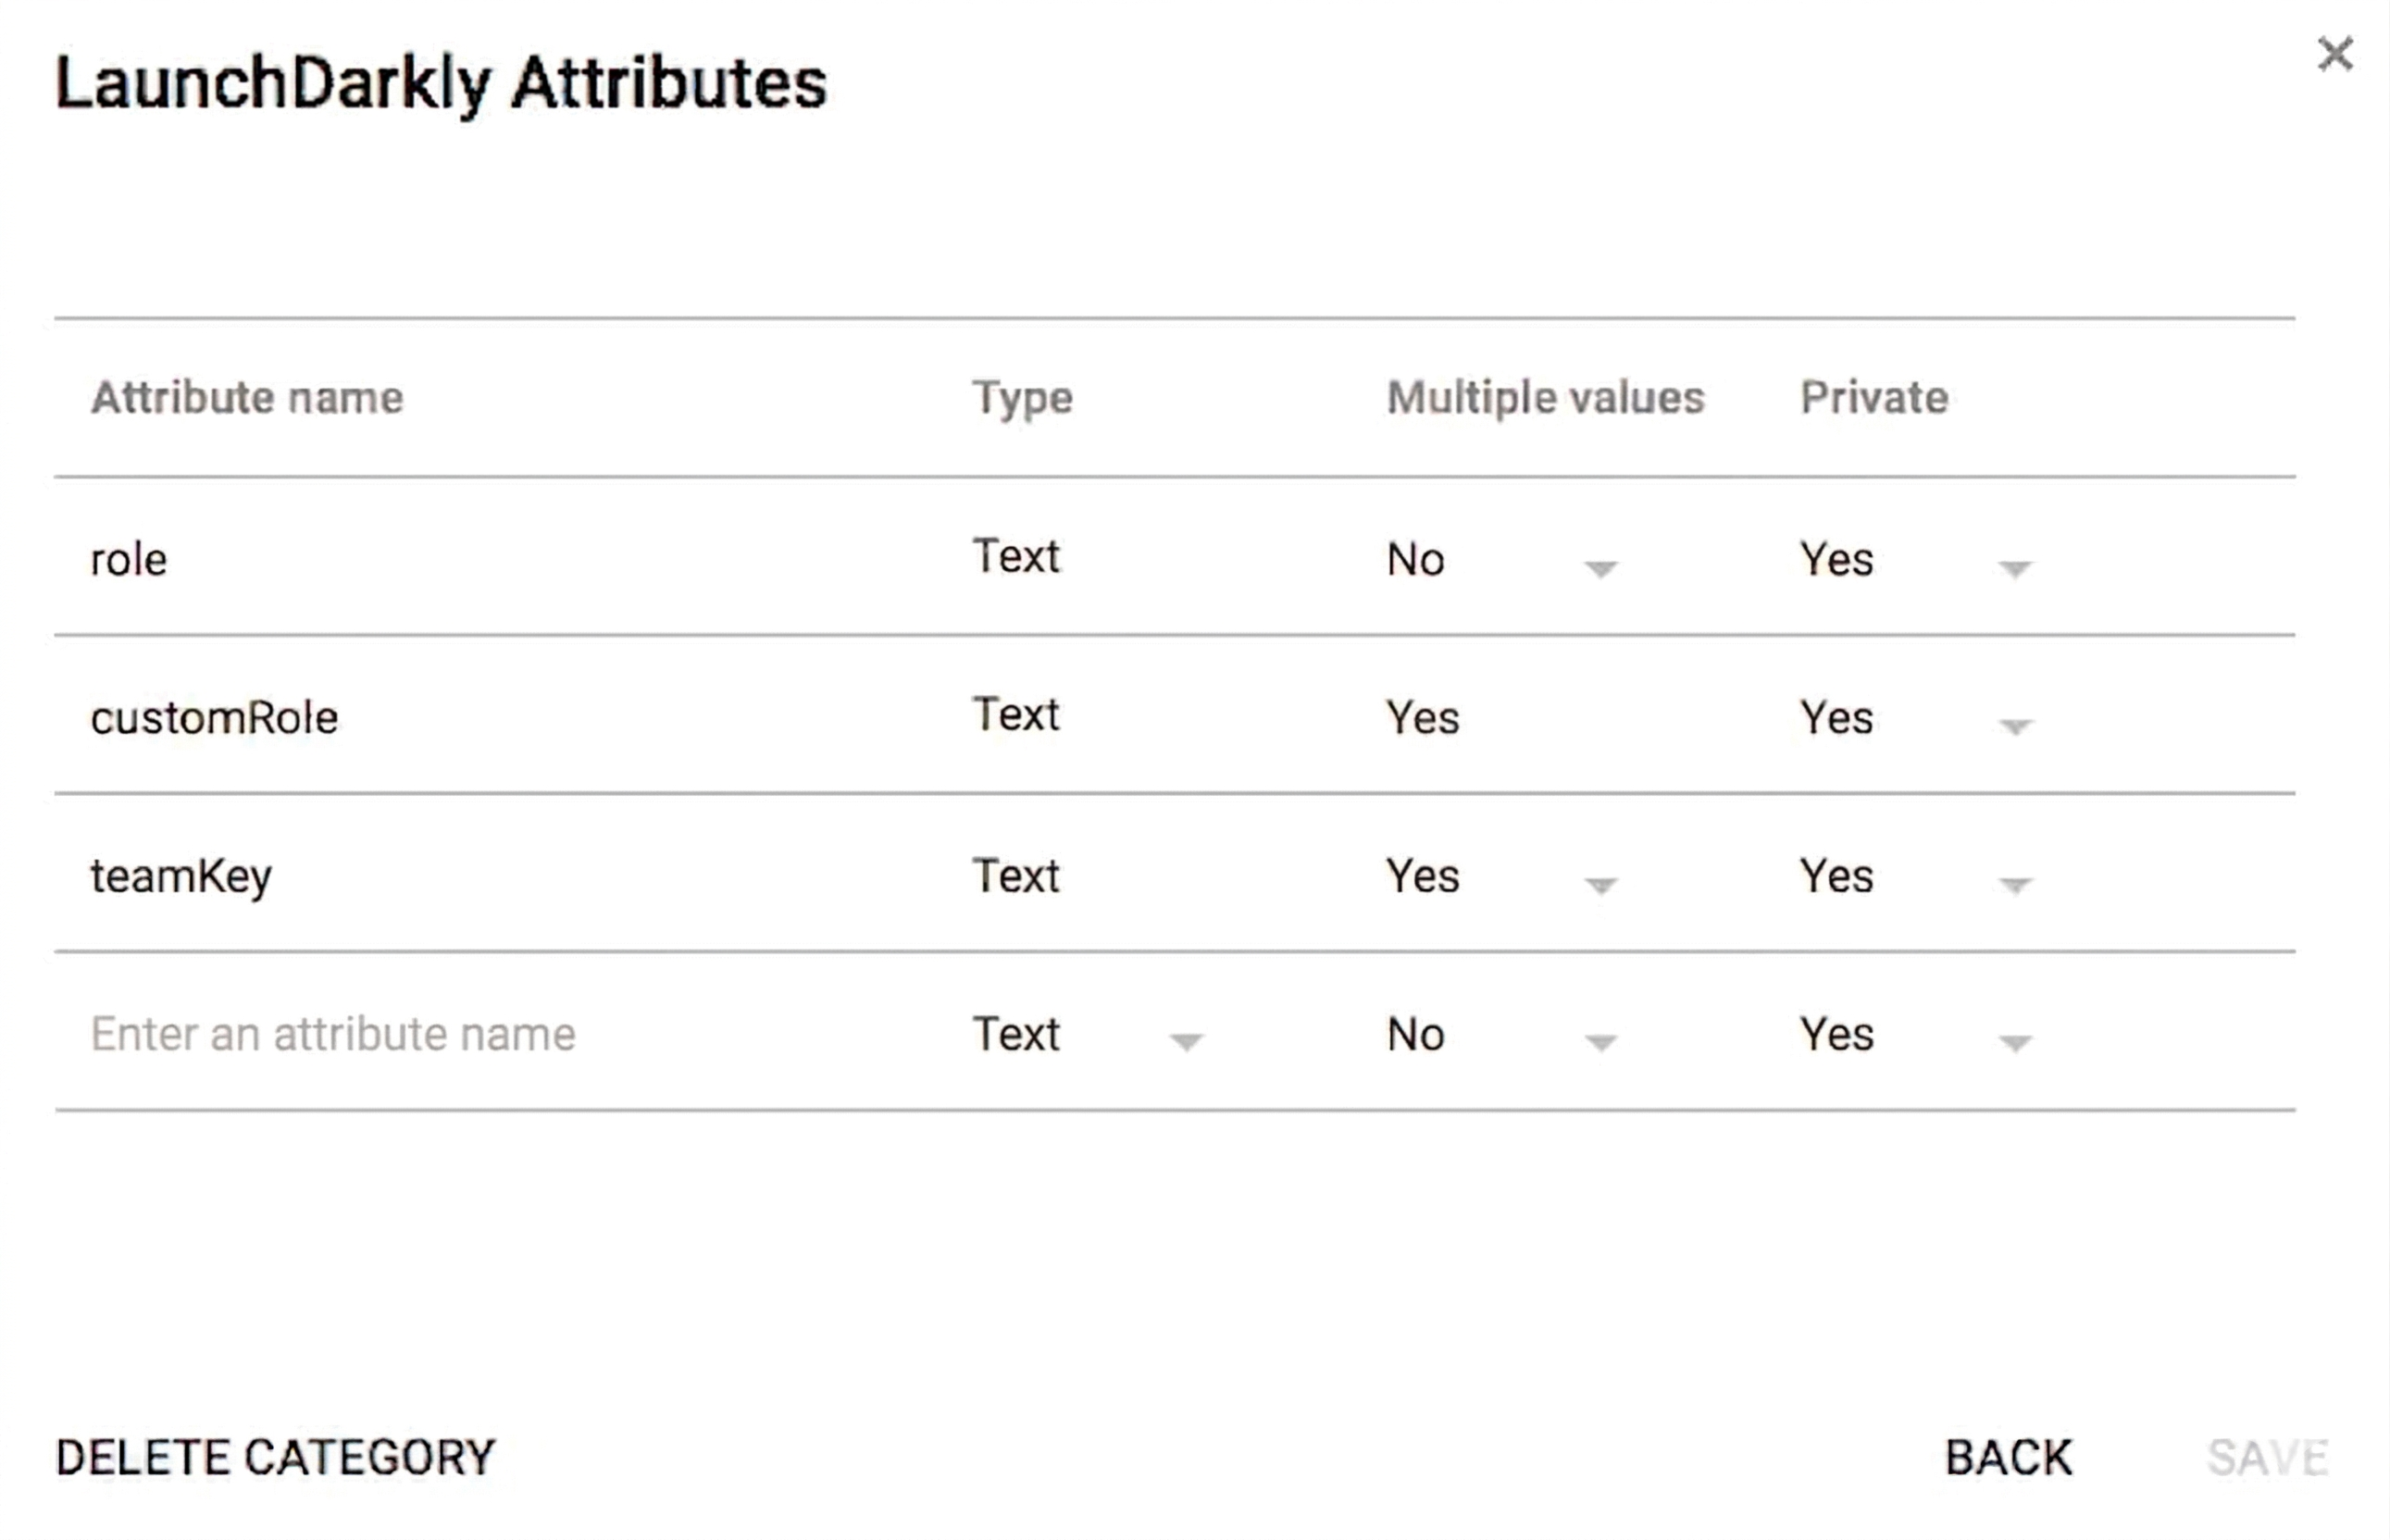
Allow multiple values for custom roles and team keys
Set the Multiple values field for customRole and teamKey to “Yes.” Some account members may have more than one custom role or team, which requires multiple values.
Add LaunchDarkly as a custom SAML application
Next, you must add LaunchDarkly to your Google Workspace apps.
To add LaunchDarkly:
- Log into Google Workspace.
- Navigate to Apps, then SAML Apps.
- Click the plus button to Add an app.
- Select Setup my own Custom App to configure LaunchDarkly. The setup workflow initiates.
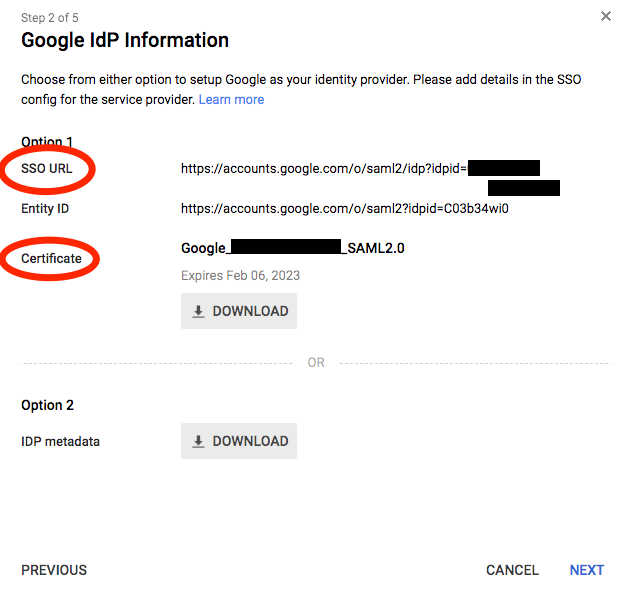
- In step 2 of the workflow, copy the information from the setup workflow. You’ll need to add this into LaunchDarkly’s Security tab under Edit SAML Configuration:
- In step 3, enter the name of the app.
- In step 4 of the workflow, provide the Assertion consumer service URL, entity ID, and start URL for your LaunchDarkly account:
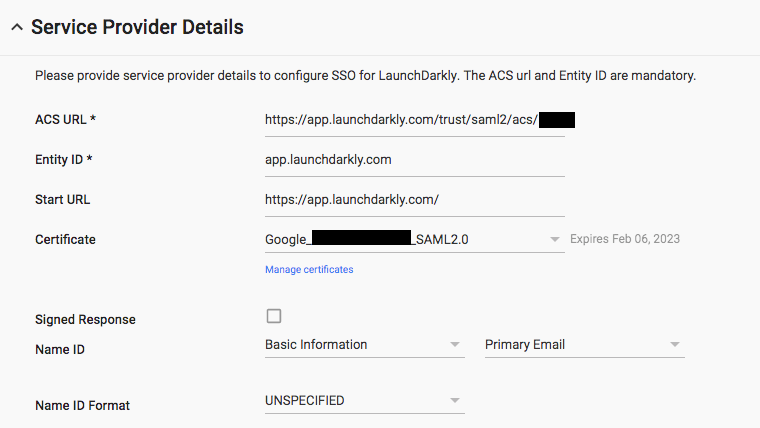
To find them, click Edit your SAML configuration on the LaunchDarkly Security tab:

- In step 5, map the LaunchDarkly attributes
firstNameandlastNameto Google’s “First Name” and “Last Name” basic information fields. Map the LaunchDarkly attributesrole,customRole, andteamKeyto Google’s “LaunchDarkly Attributes” fields of the same name. These mappings are shown below:
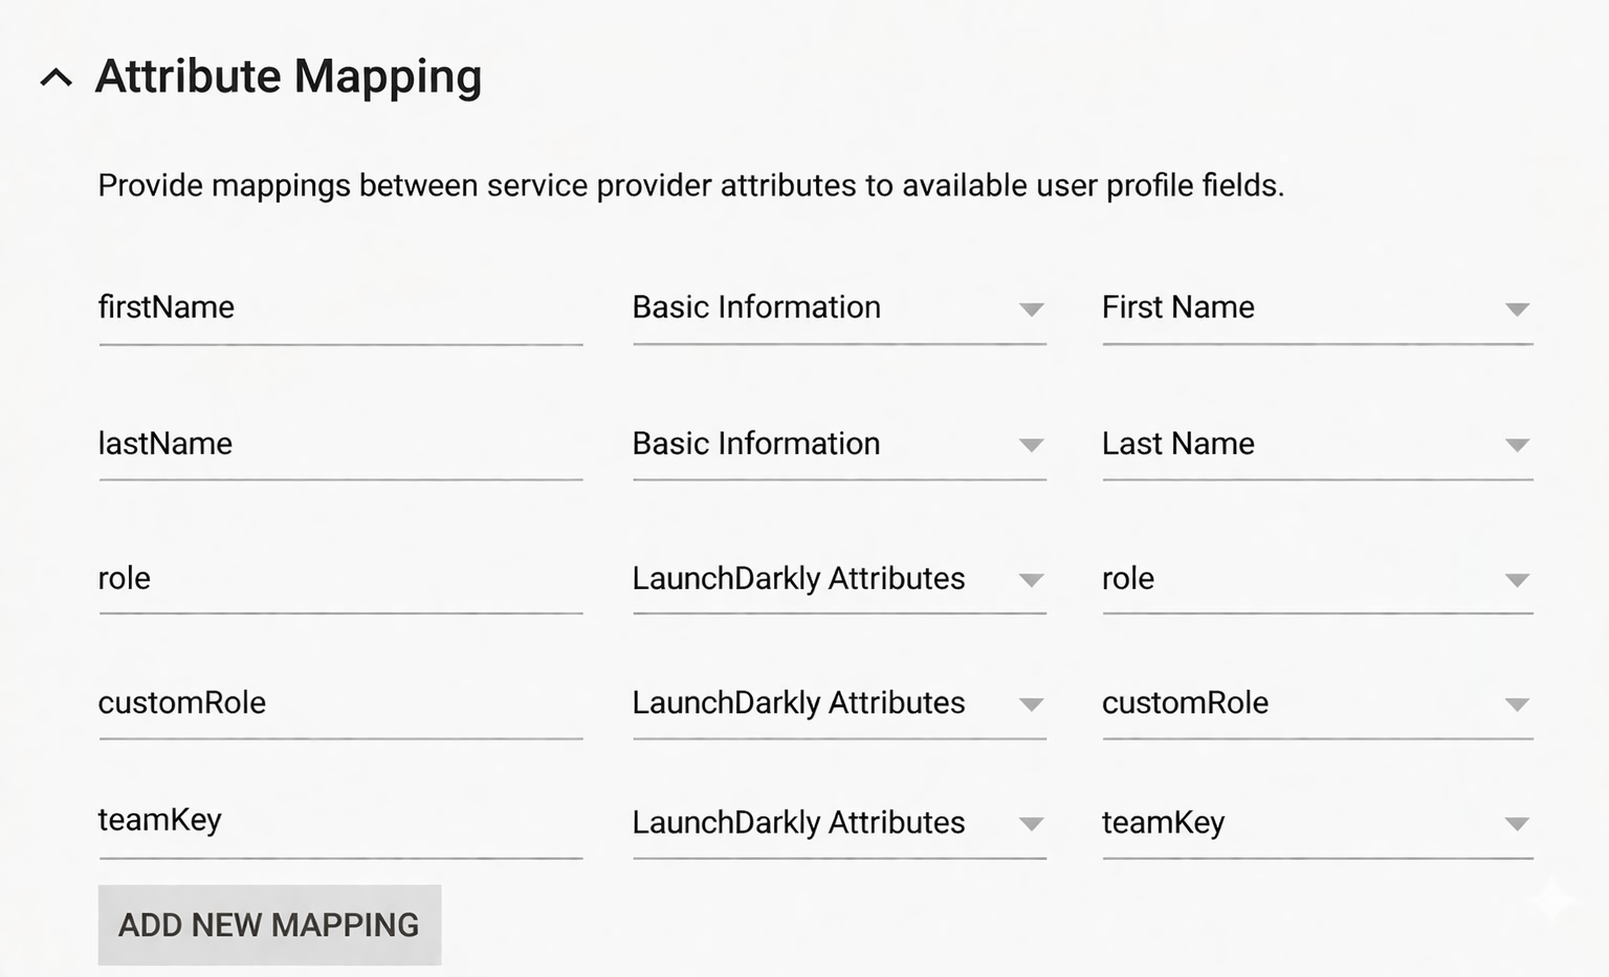
Names are case sensitive
In the screenshot above, the names in the left-hand columns map to those present in LaunchDarkly. You must name them exactly as shown, including exact casing (role, customRole, and teamKey), or configuration will fail.
You’ve successfully connected LaunchDarkly to Google Workspace.
Assign roles, custom roles, and teams with Google Workspace
Now that the application is configured, you can assign roles and teams.
To assign roles and teams:
- Log into Google Workspace.
- Navigate to Directory, then Users.
- Click on the Google Workspace user that you want to assign roles to and choose Account to bring up the user’s account settings.
- Click Edit beneath “Manage user attributes” to add the user’s roles and teams to the corresponding attribute fields:
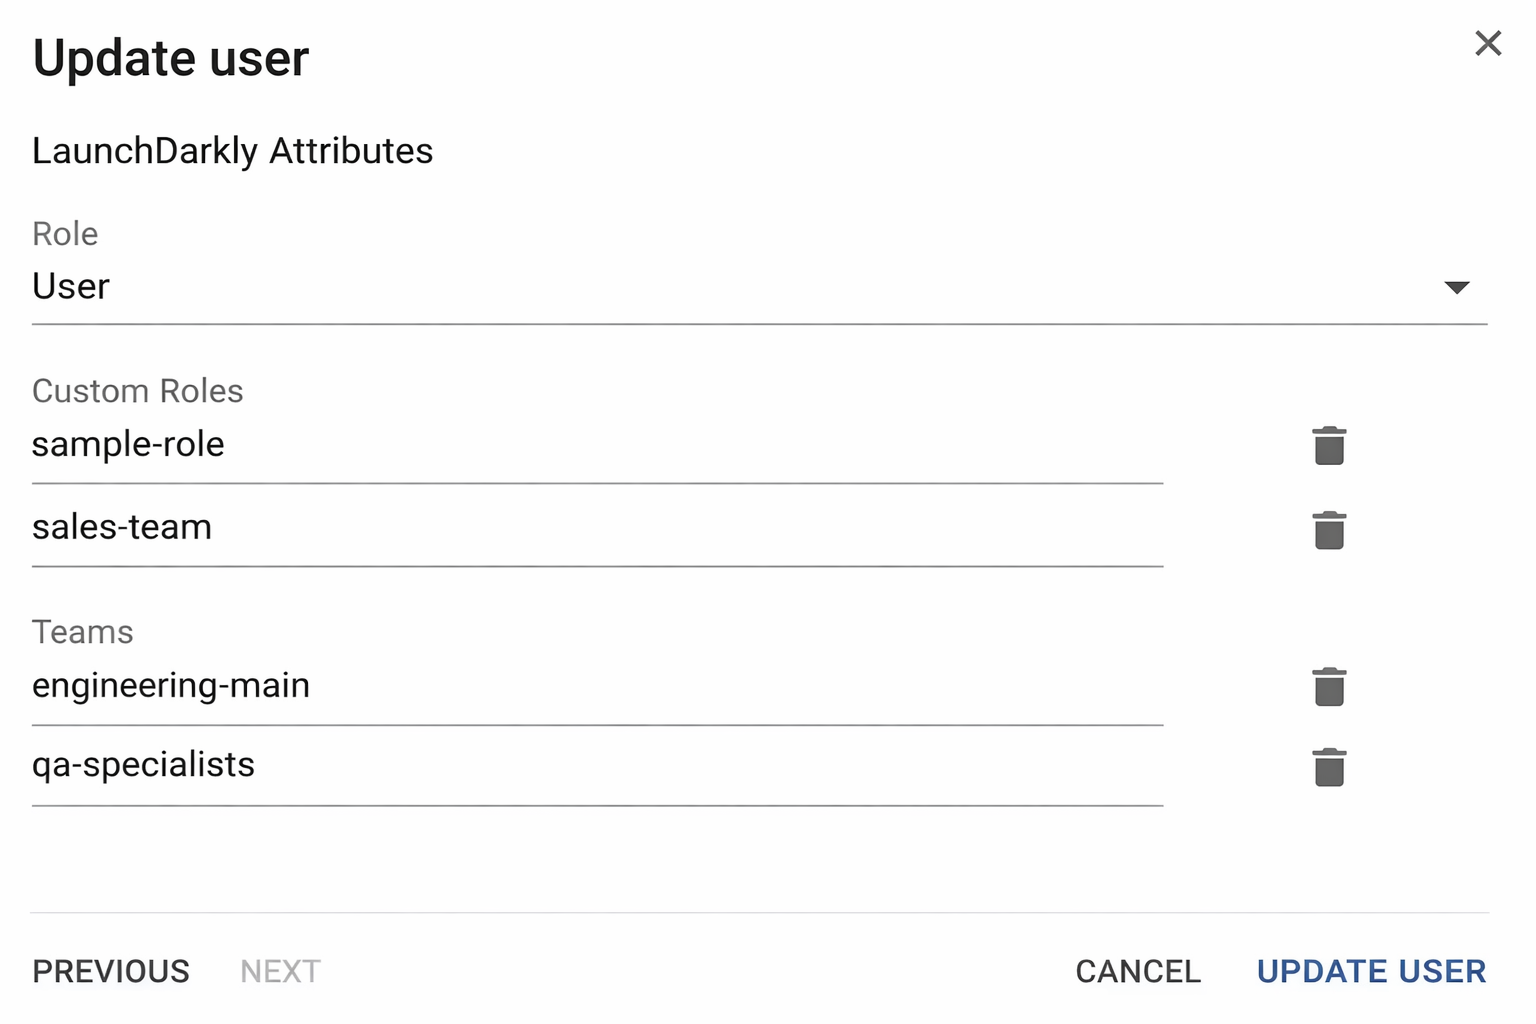
- Click Update User.
The next time this user logs into LaunchDarkly through Google Workspace, their roles and teams will update. If this is a brand new LaunchDarkly account member, an account will be created automatically with the roles and teams you specified.
Removing existing roles and teams
SAML ignores empty role, customRole, and teamKey fields. To clear all existing roles or teams, enter an empty string "" into the field.